Saturday, 7 November 2009

Animated textures in Maya

Hey Guys,

I thought I’d explain animated textures. Years ago In a galaxy far far away using 3dsmax I used a sequence of files for example:

Test.0001.tif
Test.0002.tif
Test.0003.tif
Test.0004.tif
Test.0005.tif

You would store these files in a folder and then write a small batch file and save it as an IFL (Image File List), so - animated.ifl

It seems maya uses IFF instead of IFL

http://www.spafi.org/index.php?Itemid=29&id=287&option=com_content&task=view

You would also have a path name to where the files are being stored.

So in theory you can have animated reflections, if you export the footage opposite your scene as tif’s.

Here is a link on the subject, maybe Theiry can have a look ? might be quite interesting.

Seb

Tuesday, 13 October 2009

MR Texture Gamma Correct 0.5


Hey Guys... I found a great tools can really help us to solve texture wash out problem in linear workflow..it`s called "MR Texture Gamma Correct 0.5" ,it`s written by S. Mulders & T. Welman and it can add gamma-correction to your materials with file textures and use Mel to do these awful things. This may be necessary when using mia_exposure control. below are the links all about this Mel :
info: http://toi.bk.tudelft.nl/?module=meldb&page=details&sID=42
download: for windows 32bit ; for max osx

just try it now ~

take care guys!

Tu

Monday, 28 September 2009

Diffuse No Shadow - not working using Passes method

Hey Guys,


I'm trying to render out some passes for my current project, the Ambient Occulusion and Shadows I have done as Layers and the the others I am doing as Passes.

The Diffuse No Shadow [DNS] doesn't seem to be working where as the master beauty is doing what the DNS shouldbe but still has reflections on it.

I've used the same technique as I did for my jet in regards to the passes set up, the only different is that I'm using Final Gather and IBL with some other lights. My Jet scene just uses a spot light dome. It seems like the DNS pass is doing what it should and not rendering out shadows but it look really dark in places, it should look bright but just flat colour diffuse, no shading or reflections. (My jet DNS pass looks exactly how it should, I'm thinking it could be a IBL/FG issue. I've tried selecting the Passes layer and turning the main sunlight (only light casting shadows) to Raytrace shadows OFF, but that turns off all shadows for all Layers, it's not Layer specific even with the orange override. Any suggestions ?

It would also be nice to know how to turn off shadows for one layer and turn on for other layers using the override command, i can't get that to work otherwise.

Here are the Master Beauty and Diffuse No Shadow passes.
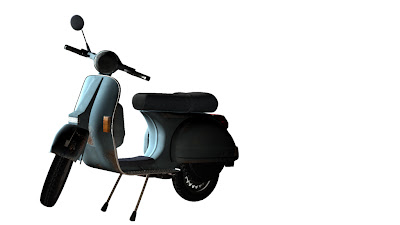


(above) Diffuse No Shadow pass, click for larger image, looks like FG isn't doing it's job or other lights arn't working but they are in the Passes Layer.
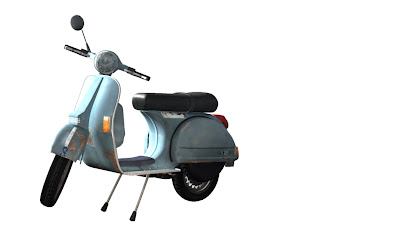


(above) Beauty pass, click for larger image, closer but reflections etc are baked in, no good :(


(above) Diffuse No Shadow, click for larger image, exactly how it should turn out
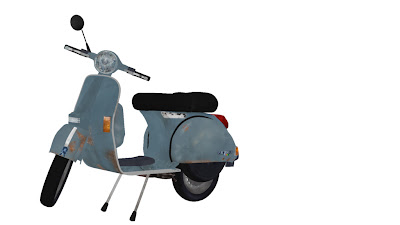


(above) flat colour diffuse, click for larger image, does what it says on the tin but different effect to the jet diffuse no shadow, there is no colour shading.

Wednesday, 23 September 2009

DEMO PROJECT..


HI GUYS
HOW ARE YOU ? , I HOPE YOU GUYS EVERYTHING IS FINE..

FINALLY I ALMOST FINISH MY FIRST SHOT OF MY DEMO...HERE YOU GO ......YEAH...ONLY ONE IMAGE..... I ENSURE THAT THE ANIMATION VERSION ALMOST DONE ..I`LL POST THAT AS SOON AS POSSIBLE....
EVERYTHING IN THIS SHOT ARE 3D ...
I USED CAMERA PROJECTION TECHNICS FOR BUILD THE TOKYO CITY AND MAYA OCEAN SHADER FOR THE OCEAN SURFACE , END UP WITH THE MR PHYSICAL SUN & SKY FOR LIGHTING..HOPE YOU LIKE IT.

CHEERS

TU

Monday, 14 September 2009

texture baking explained


Texture baking is taking the different texture maps and making one map out of them. For example, if you have a the following maps I did below you can bake them to one map shown above. Bump, specular, transparency, diffuse and light infomation from the scene light rig is all 'baked' together in one map. This is done so when you make video game model's characters, levels the processor doesn't have to calculate it all real time, so you can use the cpu power to do other things. Thats my understanding of it...i guess you can use it in VFX, saves you loading in loads of maps and calculating everything, if the scene is set static with the light setup baked in you can do away with lights all together in the scene to save processing. :)

you can also export the occlusion map and then run it over the baked map using the multiplyer function.


Monday, 7 September 2009

baking spec, bump, transparency,diffuse,occlusion = 1 map

If anyone needs any help on texture baking, I've pretty much mastered it, let me know if you need help

Tuesday, 25 August 2009

linear workflow

So this is supposed to be a big deal. Admittedly I can't remember there being much of an emphasis on this at Escape - the general impression I got was everything gets saved/fixed in comp. I didn't even know the framebuffer tab in mental ray even existed until a few days ago.

So here we are, some useful links regarding linear workflow:

http://3dlight.blogspot.com/2008/09/linear-workflow-for-maya-mental-ray.html
http://www.djx.com.au/blog/2008/09/13/linear-workflow-and-gamma/
http://www.floze.org/2008/07/six-tuts-on-light-and-shade-part-i.html

Let us know if you get your head around it :-)