Thursday, 24 December 2009
Cola Sim
My latest project . Wanted to learn fluid simulation in RealFlow , so I made a simple clip .
Learning to create this sim , & preparing the scene , shaders & lighting took just one day ( I must add that I already made the glass a long time ago , & the can I got for free from the net , so modeling wasn't an issue ) . But the bloody foam took me two weeks !!! & I'm still not happy with it . I tried so many different things trying to make it look believable ( subsurface scattering , translucency , opacity maps , refraction ... etc ) , & in the end I settled on this .
Anyhoo , decided to move on to the next project . Hope you guys like it ;) .
Peace,
Aziz
Software used : Max 2009 , RealFlow 4 , Vray , AE
Tuesday, 1 December 2009
Shopping incident ...
Hey guys , check out my latest project . I shot it with my crappy Canon Powershot in one take ( brother & cousin were too tired for reshoot ) , but it did the job I guess :) . Comments & Critique are welcome :D .
Aziz
Saturday, 14 November 2009
Serenity
Hey guys ,
Been a while . Hope you're all doing well .
So , my brother asked me to help him out with his art project . The theme was to use his body somehow as a tool for art . So we decided to make growing tattoos .
I had to track , camera project , model his body ( for geo tracking & projecting ) & the room ...etc . I only had my canon PowerShot to use ( the normal camera I had with me in England ) , so as you can imagine , it didn't shoot the highest quality of videos , hehehe , which was the trickiest part of this whole project . After many failed attempts , we ended up with only two days to shoot & get the job done . Also because the camera was bad , I had to stick relatively big tracking markers on my brother's body .
The hardest part of it all was removing the big tracking markers & putting his skin back on , especially since lighting was constantly changing on his skin while he was moving . To over come this , I had to build the areas that covered the markers , render to texture ( that means projecting my brother's skin with the markers on the geometry ) & remove the tracking markers in PS . Of course I had to do this on a few different frames throughout the shot & blend them together to match the lighting ( one frame just didn't cut it ) .
For tracking , I had to denoise the footage in After Effects , especially on the blue channel . I had to use relatively high settings , otherwise the track would keep jittering , which is why I used big markers in the end . Also , I used big white triangles sticked with normal glue on his back , as other shapes & sizes didn't give good results . I also tricked PFTrack into thinking that the geometry track was actually a camera track ( to get access to the smoothing of the curves & improving the solution options , which is not available for simple geometry tracking/motion tracking ) . Of course I also had to animate my brother's body geometry to go along with his organic movements ( spine bending & such ) . But if you concentrate , you'll still see a bit of sliding .
I used 3DS Max , PFTrack , AE & PS for this project . The tattoos are from the videocopilot's Evolution floursh collection ( but they can easily be done in AE from scratch should you choose to ) . In the end , I used soft light to blend the tattoos with the footage so it would catch the lighting of the environment .
So , without further ado , here it is ( sorry about the quality , I had to compress it a lot to be able to upload it to youtube ) :
Let me know what you think ;)
Saturday, 7 November 2009
Animated textures in Maya
Hey Guys,
I thought I’d explain animated textures. Years ago In a galaxy far far away using 3dsmax I used a sequence of files for example:
Test.0001.tif
Test.0002.tif
Test.0003.tif
Test.0004.tif
Test.0005.tif
You would store these files in a folder and then write a small batch file and save it as an IFL (Image File List), so - animated.ifl
It seems maya uses IFF instead of IFL
http://www.spafi.org/index.php?Itemid=29&id=287&option=com_content&task=view
You would also have a path name to where the files are being stored.
So in theory you can have animated reflections, if you export the footage opposite your scene as tif’s.
Here is a link on the subject, maybe Theiry can have a look ? might be quite interesting.
Seb
Tuesday, 13 October 2009
MR Texture Gamma Correct 0.5

Hey Guys... I found a great tools can really help us to solve texture wash out problem in linear workflow..it`s called "MR Texture Gamma Correct 0.5" ,it`s written by S. Mulders & T. Welman and it can add gamma-correction to your materials with file textures and use Mel to do these awful things. This may be necessary when using mia_exposure control. below are the links all about this Mel :
info: http://toi.bk.tudelft.nl/?module=meldb&page=details&sID=42
download: for windows 32bit ; for max osx
just try it now ~
take care guys!
Tu
Monday, 28 September 2009
Diffuse No Shadow - not working using Passes method
Hey Guys,
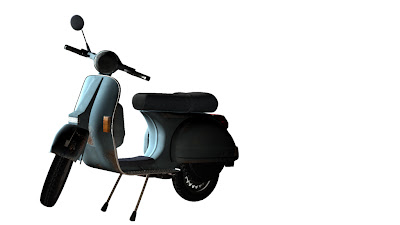
(above) Diffuse No Shadow pass, click for larger image, looks like FG isn't doing it's job or other lights arn't working but they are in the Passes Layer.
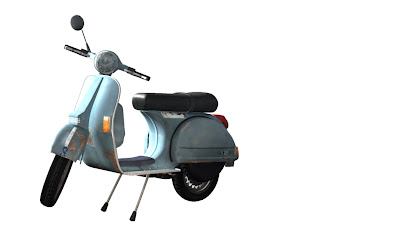
(above) Beauty pass, click for larger image, closer but reflections etc are baked in, no good :(
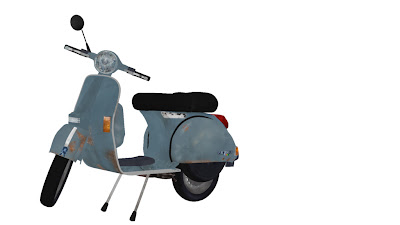
(above) flat colour diffuse, click for larger image, does what it says on the tin but different effect to the jet diffuse no shadow, there is no colour shading.
I'm trying to render out some passes for my current project, the Ambient Occulusion and Shadows I have done as Layers and the the others I am doing as Passes.
The Diffuse No Shadow [DNS] doesn't seem to be working where as the master beauty is doing what the DNS shouldbe but still has reflections on it.
I've used the same technique as I did for my jet in regards to the passes set up, the only different is that I'm using Final Gather and IBL with some other lights. My Jet scene just uses a spot light dome. It seems like the DNS pass is doing what it should and not rendering out shadows but it look really dark in places, it should look bright but just flat colour diffuse, no shading or reflections. (My jet DNS pass looks exactly how it should, I'm thinking it could be a IBL/FG issue. I've tried selecting the Passes layer and turning the main sunlight (only light casting shadows) to Raytrace shadows OFF, but that turns off all shadows for all Layers, it's not Layer specific even with the orange override. Any suggestions ?
It would also be nice to know how to turn off shadows for one layer and turn on for other layers using the override command, i can't get that to work otherwise.
Here are the Master Beauty and Diffuse No Shadow passes.

(above) Diffuse No Shadow pass, click for larger image, looks like FG isn't doing it's job or other lights arn't working but they are in the Passes Layer.

(above) Beauty pass, click for larger image, closer but reflections etc are baked in, no good :(

(above) flat colour diffuse, click for larger image, does what it says on the tin but different effect to the jet diffuse no shadow, there is no colour shading.
Wednesday, 23 September 2009
DEMO PROJECT..

HI GUYS
HOW ARE YOU ? , I HOPE YOU GUYS EVERYTHING IS FINE..
FINALLY I ALMOST FINISH MY FIRST SHOT OF MY DEMO...HERE YOU GO ......YEAH...ONLY ONE IMAGE..... I ENSURE THAT THE ANIMATION VERSION ALMOST DONE ..I`LL POST THAT AS SOON AS POSSIBLE....
EVERYTHING IN THIS SHOT ARE 3D ...
I USED CAMERA PROJECTION TECHNICS FOR BUILD THE TOKYO CITY AND MAYA OCEAN SHADER FOR THE OCEAN SURFACE , END UP WITH THE MR PHYSICAL SUN & SKY FOR LIGHTING..HOPE YOU LIKE IT.
CHEERS
TU
Subscribe to:
Posts (Atom)
